How to Allow Button to Be Clicked Again Android
Android - Button Control
A Push is a Push button-button which tin can be pressed, or clicked, by the user to perform an action.
Button Attributes
Following are the important attributes related to Button command. Yous can cheque Android official documentation for complete list of attributes and related methods which y'all tin utilize to change these attributes are run time.
Inherited from android.widget.TextView Class −
| Sr.No | Attribute & Clarification |
|---|---|
| 1 | android:autoText If prepare, specifies that this TextView has a textual input method and automatically corrects some common spelling errors. |
| 2 | android:drawableBottom This is the drawable to exist drawn below the text. |
| iii | android:drawableRight This is the drawable to be drawn to the right of the text. |
| 4 | android:editable If set, specifies that this TextView has an input method. |
| 5 | android:text This is the Text to brandish. |
Inherited from android.view.View Class −
| Aspect | Clarification |
|---|---|
| 1 | android:background This is a drawable to use as the groundwork. |
| 2 | android:contentDescription This defines text that briefly describes content of the view. |
| 3 | android:id This supplies an identifier name for this view. |
| 4 | android:onClick This is the proper name of the method in this View's context to invoke when the view is clicked. |
| v | android:visibility This controls the initial visibility of the view. |
Case
This example will take yous through simple steps to evidence how to create your ain Android application using Linear Layout and Button.
| Pace | Description |
|---|---|
| 1 | You will use Android studio IDE to create an Android application and name it as myapplication under a parcel com.example.saira_000.myapplication as explained in the How-do-you-do Earth Instance chapter. |
| 2 | Alter src/MainActivity.java file to add a click event. |
| 3 | Alter the default content of res/layout/activity_main.xml file to include Android UI control. |
| 4 | No need to declare default cord constants at string.xml, Android studio takes intendance of default string constants. |
| v | Run the application to launch Android emulator and verify the result of the changes done in the application. |
Following is the content of the modified principal activity file src/MainActivity.coffee. This file can include each of the fundamental lifecycle methods.
packet com.instance.saira_000.myapplication; import android.content.Intent; import android.net.Uri; import android.support.v7.app.ActionBarActivity; import android.os.Bundle; import android.view.Carte du jour; import android.view.MenuItem; import android.view.View; import android.widget.Button; import android.widget.Toast; public grade MainActivity extends ActionBarActivity { Button b1,b2,b3; @Override protected void onCreate(Bundle savedInstanceState) { super.onCreate(savedInstanceState); setContentView(R.layout.activity_main); b1=(Push button)findViewById(R.id.push button); b1.setOnClickListener(new View.OnClickListener() { @Override public void onClick(View 5) { Toast.makeText(MainActivity.this,"YOUR MESSAGE",Toast.LENGTH_LONG).show(); } }); } } Following volition be the content of res/layout/activity_main.xml file −
<?xml version="ane.0" encoding="utf-viii"?> <RelativeLayout xmlns:android="http://schemas.android.com/apk/res/android" xmlns:tools="http://schemas.android.com/tools" android:layout_width="match_parent" android:layout_height="match_parent" android:paddingLeft="@dimen/activity_horizontal_margin" android:paddingRight="@dimen/activity_horizontal_margin" android:paddingTop="@dimen/activity_vertical_margin" android:paddingBottom="@dimen/activity_vertical_margin" tools:context=".MainActivity"> <TextView android:id="@+id/textView1" android:layout_width="wrap_content" android:layout_height="wrap_content" android:text="Button Control" android:layout_alignParentTop="true" android:layout_centerHorizontal="true" android:textSize="30dp" /> <TextView android:id="@+id/textView2" android:layout_width="wrap_content" android:layout_height="wrap_content" android:text="Tutorials bespeak" android:textColor="#ff87ff09" android:textSize="30dp" android:layout_below="@+id/textView1" android:layout_centerHorizontal="truthful" /> <ImageButton android:layout_width="wrap_content" android:layout_height="wrap_content" android:id="@+id/imageButton" android:src="@drawable/abc" android:layout_below="@+id/textView2" android:layout_centerHorizontal="true" /> <EditText android:layout_width="wrap_content" android:layout_height="wrap_content" android:id="@+id/editText" android:layout_below="@+id/imageButton" android:layout_alignRight="@+id/imageButton" android:layout_alignEnd="@+id/imageButton" /> <Push android:layout_width="wrap_content" android:layout_height="wrap_content" android:text="Button" android:id="@+id/push" android:layout_alignTop="@+id/editText" android:layout_alignLeft="@+id/textView1" android:layout_alignStart="@+id/textView1" android:layout_alignRight="@+id/editText" android:layout_alignEnd="@+id/editText" /> </RelativeLayout>
Following volition be the content of res/values/strings.xml to define these new constants −
<?xml version="1.0" encoding="utf-viii"?> <resources> <string proper name="app_name">myapplication</cord> </resources>
Following is the default content of AndroidManifest.xml −
<?xml version="1.0" encoding="utf-8"?> <manifest xmlns:android="http://schemas.android.com/apk/res/android" packet="com.instance.saira_000.myapplication" > <application android:allowBackup="true" android:icon="@drawable/ic_launcher" android:label="@string/app_name" android:theme="@fashion/AppTheme" > <activeness android:name="com.case.guidemo4.MainActivity" android:label="@string/app_name" > <intent-filter> <activity android:proper noun="android.intent.action.Main" /> <category android:name="android.intent.category.LAUNCHER" /> </intent-filter> </activity> </awarding> </manifest>
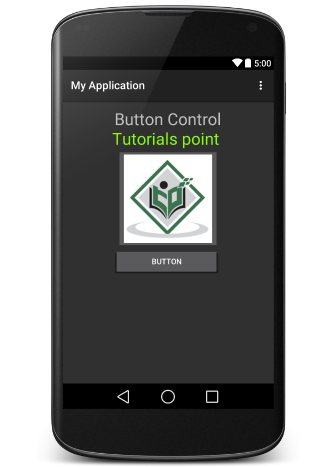
Let's try to run your GUIDemo4 application. I assume you had created your AVD while doing environment setup. To run the app from Android Studio, open up one of your projection's activeness files and click Run  icon from the toolbar.Android Studio installs the app on your AVD and starts it and if everything is fine with your setup and application, it will display post-obit Emulator window −
The following screen volition appear by clicking on Button −

Practice
I will recommend to try above example with different attributes of Button in Layout XML file also at programming time to have different await and feel of the Button. Try to make information technology editable, change to font color, font family, width, textSize etc and see the result. You tin also try higher up case with multiple Push button controls in 1 activity.
android_user_interface_controls.htm
Useful Video Courses

Video

Video

Video

Video

Video

Video
Source: https://www.tutorialspoint.com/android/android_button_control.htm
0 Response to "How to Allow Button to Be Clicked Again Android"
Post a Comment